Building a personal portfolio or blog website can be inexpensive and a fun learning experience. Sites like SquareSpace, Wix, WordPress are great if you just want to immediately start writing blogs, but they can either be pricey or lack some customization that you may desire. For instance, sites like Wix/SquareSpace monthly fee’s can be from $12.00 - $22.00 a month. Some may think that is worth it and decide to go that route. I’m here to say there is an alternative if you want a beautiful website that’s cheap and don’t mind a learning curve to get you there.
Enter HUGO.
This blog is a step by step guide for individuals with very little coding experience to be able to create a professional looking customized website from the ground up, and learn a thing or two along the way.
Plus it only costs $12.00 a year.
Note, this blog is a journey, and not a quick “how-to”. It may take multiple weekends of sitting down and working through if you’ve never done something like this before. But once complete, you will have a professional site THAT YOU BUILT. This already goes an incredibly long way when looking for a job or showcasing your skills, and teaches you valuable aspects of the software development life cycle like using repositories, hosting websites, and setting up continuous integration/continuous deployment (CICD) pipelines.
Because this is a journey, I will have lots of images of nature and walking down trails, like this!

Because that’s exactly what this is. It’s a learning journey, and the woods may look thick, and you may not know where to go, but this blog will be your trail guide through that confusing mess. And when you reach the end, it will be like reaching the summit of a long journey, where you will finally get to see what all the hard work was for.
Also, I am fully aware that trying something new means feeling overwhelmed or sometimes feeling dumb. We all have those feelings. Please, please, please… if at any point you have a question, reach out to me. My email is dustin@dustn.dev, or you can post a comment down below. The only stupid question is the one not asked, and I am writing this blog to help people learn something, so I am here to help. I had a lot of questions during the building of these websites that I leaned on others for, so I’m hoping to pay that forward.
SPOILER ALERT:
The site you are reading this blog on is built using the methods described within. My annual cost to host this site is $12.00, which is just the cost of the domain name :). If I had more viewers/traffic (looking at you, influencers) cost may be slightly more as Firebase Hosting is based on visitors, but let’s be honest… personal blogs/portfolios aren’t going to be hitting those kind of numbers any time soon.
Also, hugo has themes for E-commerce sites as well as ways to establish contact forms/forums, so it’s not just a platform for blogs/portfolios.
Since I was in the process of building out a new Hugo website for my side-gig company, Attica, I wanted to document the steps, both for myself and for anyone else who may be interested in going down this route.
The tech stack I used for building my websites are listed below. Note, you don’t have to be proficient in any of these tools for all of this to integrate together, and I will be guiding you through these steps, so please don’t feel overwhelmed! Also, I use Github/FireBase, but this can be setup using other repositories/hosting platforms if you are more comfortable with those.
Tech Stack
-
Hugo: Static Website Templates/Framework
-
Docker: For compiling/containerizing your website
-
FireBase Hosting: For Hosting the website for the world to see
-
Github Actions: Kicks off a CI/CD pipeline to publish the website when updates are pushed into Github.
For Fun
- Google Analytics: For knowing how many people visit, pages visited, etc. (If you’re interested)
Couple other notes on my environment
-
I’m on a MacBook Pro, so that’s the environment this is geared towards.
-
I’m using GoLand as my IDE. Sublime/Atom work well for this as well, so use whatever you’re comfortable with. I’m just most familiar with JetBrains suite of IDE’s.
-
I use Fish Shell but will include default terminal commands where necessary.
-
I use Homebrew to pull in dependencies.

Proficiencies
-
Git: You will need to know how to clone/submit code. Some IDE’s (like GoLand) can handle all of this for you, but if you’re feeling overwhelmed by this, reach out!
-
Coding Ability: You will be modifying some files, but HUGO tries to handle the hard stuff for you, so most of the items you modify are straightforward. Again, if you have questions, I’m here to help, so reach out :)
-
Markdown: Required when writing content for website.
Now, let’s get started!

Getting Started
- Domain Name: Since we are building a website, the first thing you need to get is a domain. I typically just use Google Domains for this.
- Setup a Github Account
- Setup a Firebase Account
Setting up Hugo
I will quickly highlight how to set up a Hugo project.
These steps are taken from the following guide: Hugo Getting Started
First step is to go ahead and install Hugo.
brew install hugo
Once it finishes, run hugo version to make sure it installed appropriately.
Then run the following:
hugo new site <name>
Note: Swap out name <name> for a name of your choosing. This can either be your domain name or something along those lines.
And DONE! Hugo has set up everything we need to add content and host a website.
So far so good, right? Next, lets make our website pretty.
Build Your Website
Choosing a Theme
Now, for the hardest part… finding your theme! Themes are Hugo’s preset layouts that you can browse through the link below. Hugo makes swapping in and out new themes easy, so feel free to experiment until you find one that you like. Head on over to Hugo Themes and find one that fits the look you’re going for with your site.
Note: The theme I am using for this blog is a slightly modified version of Beautiful Hugo. For my Attica site, I decided to go with the Timer-Hugo theme.
Setting up your Theme
Themes can be contributed to the community by individual developers. Each theme has installation instructions listed on their pages, but in short, you just need to do the below.
Go ahead and move into the directory of your project that you created above.
cd <name>
mkdir themes # <--- If it doesn't exist already
cd themes
git clone <link to themes git>
Again, these instructions can be found on your themes main page if you need more detailed instructions.
And finally, let Hugo know which theme you decided to go with by putting the name into the config.toml file with the below command:
echo 'theme = "<theme>"' >> config.toml
And done! If you run the below command, you will see you have the shell/template of a site ready for you to start adding content. Exciting!
hugo server
When you run the above command, you should see some output that looks like the below:
                   | EN
-------------------+-----
  Pages            |  6
  Paginator pages  |  0
  Non-page files   |  0
  Static files     | 31
  Processed images |  0
  Aliases          |  0
  Sitemaps         |  1
  Cleaned          |  0

Running in Fast Render Mode. For full rebuilds on change: hugo server --disableFastRender
Web Server is available at http://localhost:61305/ (bind address 127.0.0.1)
Press Ctrl+C to stop
This is actually how you can test out your website locally prior to deploying it to be accessed by the rest of the world. Select the localhost link above and it will display what your end result website will look like once published.
Now, if you haven’t modified your config.toml file (which you most likely haven’t since I didn’t go over it), when you run the above command, you will probably not see much on the site. No worries. If you navigate into the themes/<your chosen theme> directory, each theme typically comes with an example website. Try to copy/paste there config.toml file in place of your own, and republish using hugo server. Typically theme designers use this sample site to show everything that is possible within their created themes, and since each theme has slight variations, that is outside of the scope of this blog to go into each one. Again, if you have questions, reach out. But tinkering/experimentation will get you to where you want to go, and the language/syntax inside of these files attempts to be straightforward enough so that you know exactly what you are modifying. For example, this is a portion of my config.toml for this blog website that you’re reading now.
[Author]
  name = "Dustin Summers"
  website = "/page/about"
  email = "dustin@dustn.dev"
  github = "dustinsummers"
  twitter = "DustNSummers"
  linkedin = "dustin-summers-32856937"

[[menu.main]]
    name = "Blog"
    url = ""
    weight = 1

[[menu.main]]
    name = "Presentations"
    url = "page/presentations"
    weight = 2

[[menu.main]]
    name = "About"
    url = "page/about/"
    weight = 3

[[menu.main]]
    name = "Tags"
    url = "tags"
    weight = 4
As you can see from the above, this corresponds to the links/pages at the top of my blog, as well as to my “contact” pages.
Suggestion here is to tinker with the sample sites config.toml and add in content as you go until you have your desired site. If you have any questions at all during this step, please don’t hesitate to reach out :).
As you make changes, you should see those changes reflected on the page displaying your website, as hugo is designed to automatically update when you’re in this local test mode.
Create a Blog Post/Page
I want to also touch on the process for creating a new “blog post”. Type in the below command, and it will create your template for you.
hugo new posts/helloworld.md
This will create a sample template file for you.
---
title: "HelloWorld"
date: 2020-09-07T08:47:11+01:00
draft: true
---
This is where your blog goes, written in MarkDown Format!  Use the CheatSheat I linked earlier in the blog if you need to learn how to write in Markdown.
And beneath there, you can start writing your blog in MarkDown format. You can view these changes locally with the following command: hugo server -D. The -D option states that you want to include Draft Blog Posts.
When you’re ready to publish the blog, replace draft: true with draft: false and deploy the site! (which I will be going over in the next step).
Note:
I know I’m skipping over a large part of what it takes to customize your site, but again, every template is different. If you have specific questions or need help at all along the way, let me know. Continue designing your website and customizing it to your liking until you are happy with it and are ready to publish it.
This may take a couple weekends to completely finish, but don’t worry. This how-to guide isn’t going anywhere. Take your time, and reach out if you have questions.
Setting Up a Code Repository
If you’ve made it this far, you have successfully built your website, added a couple content pages, and customized it to your liking.
Now that you have a local version of your website that you are proud of, it’s time to start wiring up the other pieces of our stack mentioned above so that we can show the world what you built.

Github
First thing we need is a repository to store our fancy new websites code. This will also be used as a launching point to compile/publish any new changes we make to the website.
I am using Github for the purposes of this blog, but any repository should do.
Setting up Github
Head on over to Github and get setup with an account if you don’t already have it. Once logged in, go ahead and select “New” at the top of the screen, and fill in the details.

Pushing to Github
Once you’ve set up the repository by inputting the above information, you will now see some snippets on how to push to the repo. It should look something like below:
echo "# <something you want to say about this site>" >> README.md
git init
git add README.md
git commit -m "first commit"
git branch -M master
git remote add origin git@github.com:<your github name>/<your new repo>.git
git push -u origin master
Go ahead and run those commands from within the top-level local folder that contains your website.
If you have any issues running the above commands, see the below “Quick Note” section.
If you didn’t have any issues, you should now see your website files on Github.
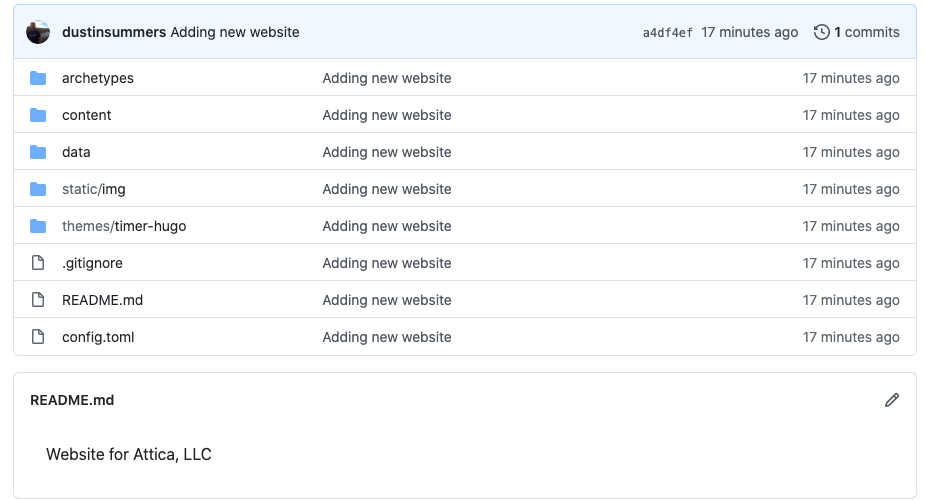
NOTE: As your building out your site, should you need to add any new changes to your site, simply use the following commands.
git add . #<---- Adds everything in directory to our stage to prep for our push
git commit -m "<message about these changes>" #<----- Commits these changes with a new message
git push #<---- Push to our repo
If you’ve stuck with me so far, give yourself a pat on the back! This is a huge deal, and you are even closer to having your own hosted website! (And hopefully learning a little bit along the way).

Quick Note:
Even just setting up Github/working with Git is a non-trivial task. It is easy to feel overwhelmed by this if you have never experienced it before. Again, reach out if you have any issues. And chances are, someone has run into this EXACT same issue before, so also try a quick Google search.
If you get some kind of error like “permission denied” and you’ve never had a Github/used git before, you probably just need to setup your SSH keys for Git. Follow these two guides to get going with that.
Hosting
The next step is to publicize your beautiful website to the world and open the floodgates to the fans waiting to swarm to your website.
But first, let’s talk a little about Firebase Hosting and why we are using it.
What is Firebase Hosting?

Creating a website is similar to creating a painting or some other piece of art. Up until now, only you have had the privilege to set your eyes on your creation. But how do you invite others to view it? You could invite them into your house but there are some concerns there. Your power may go out in the middle of a viewing, your home can’t be open 24 hours a day without some maintenance/cleaning, your home isn’t big enough for hundreds or thousands of people to come and visit, etc. So we should find a popular place to stage our creation that can handle all the foot traffic that it will bring.
Similarly, hosting a website from your own server/system is a dated practice and brings a host of problems that I’m not going to go into but are similar in nature to the metaphor used above.
There are websites that will host your site for free as long as the number of visitors is low, and their infrastructures scale with the amount of visitors to your website. You only pay for the amount of “foot traffic”, and even in my busiest week of ~5,000 visitors to my blog, I wasn’t charged.
That is exactly what Firebase Hosting provides.
Setting Up Firebase Hosting
So let’s head to Firebase and get setup with an account. Once your accounts setup, you should see a button that looks like this:
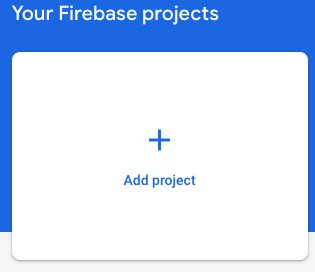
We first need to create a project for our website, as Firebase has quite a large bundle of nifty features that you could add to your website.
Select this button, and it’s going to ask you some questions about the project.
On the first screen, simply enter the name for the project (typically just your websites name like my-new-blog-site).
On the next screen, it will ask if you want to enable Google Analytics. If this is something you want to have, enable it. Google Analytics allows you to see the number of visitors to your page and the pages they’re viewing.
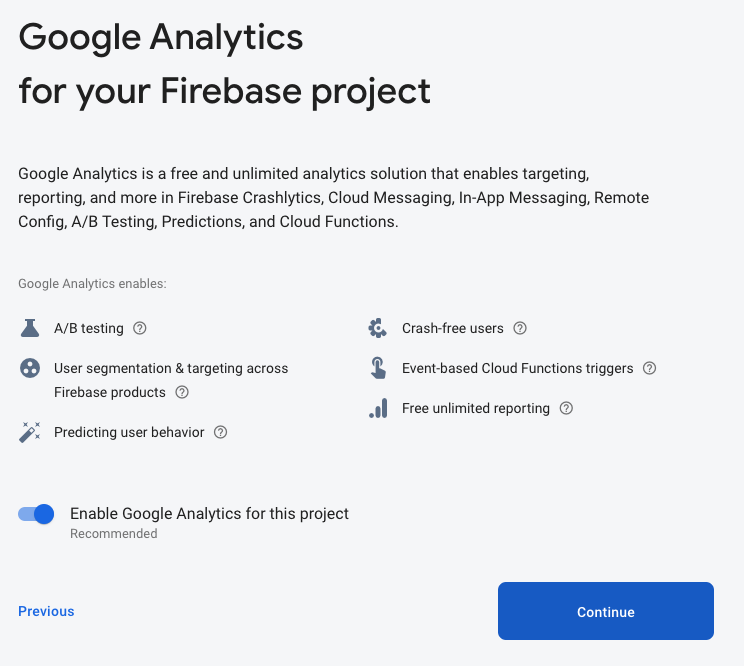
The following screen will just be some additional input for enabling Google Analytics, then your project will begin creating.
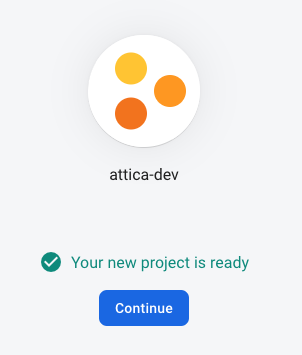
Once it’s complete, you should see something like this:
So now that we have created a project for our website, we need to set up the actual Hosting through Firebase.
On the left hand toolbar, underneath Develop, you should see Hosting.
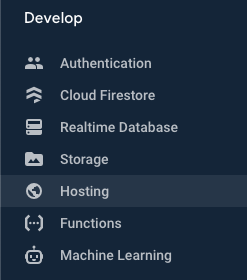
Select this, then click on the “Get Started” button in the banner.

So the next few pages on Firebase Hosting will walk you through installing firebase-tools, which is essentially a command line tool used to host your website :)
At a high level, the steps are:
- On a terminal window, run
npm install -g firebase-tools - Then run
firebase login - Followed by
firebase init
Once you run init, you will see output like the below:
     ######## #### ########  ######## ########     ###     ######  ########
     ##        ##  ##     ## ##       ##     ##  ##   ##  ##       ##
     ######    ##  ########  ######   ########  #########  ######  ######
     ##        ##  ##    ##  ##       ##     ## ##     ##       ## ##
     ##       #### ##     ## ######## ########  ##     ##  ######  ########

You're about to initialize a Firebase project in this directory:

  /path/to/your/project.com

? Which Firebase CLI features do you want to set up for this folder? Press Space to select features, then Enter to confirm your choices. (Press <space> to select, <a> to toggle all, <i> to invert selection)
 ◯ Database: Deploy Firebase Realtime Database Rules
 ◯ Firestore: Deploy rules and create indexes for Firestore
 ◯ Functions: Configure and deploy Cloud Functions
❯◯ Hosting: Configure and deploy Firebase Hosting sites
 ◯ Storage: Deploy Cloud Storage security rules
 ◯ Emulators: Set up local emulators for Firebase features
Select hosting from the above by navigating to it and pushing the space bar, then press enter.
The next screen will look like this:
You're about to initialize a Firebase project in this directory:

  /path/to/your/project.com

? Which Firebase CLI features do you want to set up for this folder? Press Space to select features, then Enter to confirm your choices. Hosting: Configure and deploy Firebase Hosting sites

=== Project Setup

First, let's associate this project directory with a Firebase project.
You can create multiple project aliases by running firebase use --add,
but for now we'll just set up a default project.

? Please select an option:
❯ Use an existing project
  Create a new project
  Add Firebase to an existing Google Cloud Platform project
  Don't set up a default project
Select Use an existing project, and hit enter.
As long as you’re logged in as described in the previous steps, this screen should show you a list of the existing projects. Select the project you created in the previous steps.
The next screen will ask you if you want to use the public directory.
Go ahead and just hit enter here to accept the default.
Next it asks if you want to use this as a single-page app. For me, since I have more than one page, I’m answered No.
Once answered, you should see the following:
✔ Firebase initialization complete!
Congrats again! You just created your first Firebase project!
Now, if you wanted to get a sneak peek of your website up to this point, you should be able to run the below commands to see your website:
hugo && firebase deploy
This will launch your website in a temporary place holder (typically whatever you named your website + some kind of firebase.webapp annotation). I’ve noticed, however, that the rendering of the page can be off unless we continue on with the steps to dockerize our website so that everything gets built properly.
Adding our Custom Domain Name
When we deploy our website, we want to have a nice custom domain for them to go to, right? Well, here is where we finally wire that up.
If you haven’t already, go ahead and get yourself a domain name for your website. I use Google Domains for mine.
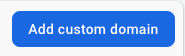
Back on the main Firebase Console, click on Hosting again on the left toolbar, then click on the “Add Custom Domain” button.
First thing it will ask you for is the domain name that you own. For me, it was attica.dev.
Next it will attempt to verify ownership of the domain.
Whether you purchased or own this domain through Google Domains or through another vendor will dictate the next steps. Since I own/purchased this domain name through Google, the verification step is skipped since it can automatically verify it. (Another bonus through purchasing through Google Domains in this type of setup :) .
If you did not purchase through Google Domains, you will be presented with a key that you will need to add to the same section where we will be adding records below, so the following steps are similar.
Again, since I purchased through Google Domains, the verification step is skipped, and I am presented with a couple A records that need to be added to my DNS profile. I can head over to the Google Domains page that manages my custom domain name to add these in.
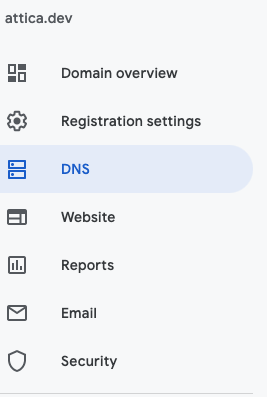
For adding the A-records, we need to look at the page which handles the Domain Name Server (DNS) configurations to add in a new resource record. Go ahead and find that page for your respective Domain owner. For Google, you can get to this page by clicking on DNS in the left-hand toolbar.
On this page, we are looking to add a Custom Resource Record which you can find at the bottom on Google Domains.
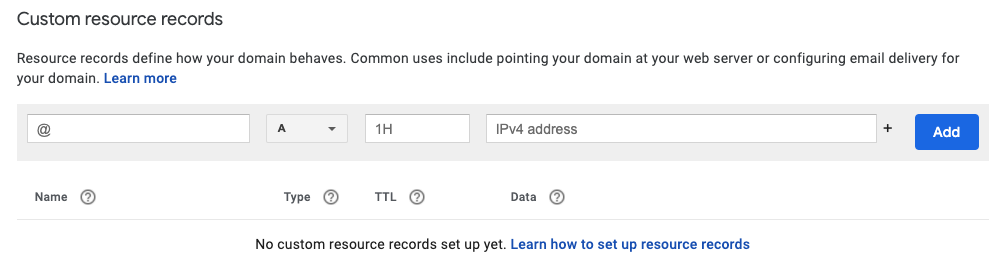
For me, since I just needed to add in A records, that just requires copying the IP Addresses that Firebase Provides to this section. Once complete, it will look similar to the below.

For more information on exactly what these should look like, visit this page, which has examples of various domain providers.
Note, these changes can take up to 24-48 hours to register. If you think about it, this is like establishing a new residential address for your home across the globe and letting THE WORLD know how they can get to your house, hence the reason for it taking a bit of time to register :). So because of that, you may see a status of Needs setup or Pending on the Firebase Hosting page under your domains. That just means that Firebase is waiting to verify that you added those records, and it’s also adding in some security protection in the form of TLS Certs, but I don’t want to bore you with that type of talk. In a couple days, you should see Connected.
Another big milestone complete. So far we have done the following:
- Built our website using Hugo.
- Stored our website code in GitHub.
- Setup a place to host our website using Firebase.
- Hooked up our Custom Domain name to redirect to our Website.
This is a big deal, and deserves another celebration!!!
Now, if you’re like me, you don’t want to have to re-remember all of these commands each time you want to create a new blog, right? Wouldn’t it be nice to live in a world where, after you have written your blog and added in the content, you simply push your new blog to GitHub and your website is automatically updated?
Well so would I!
So these next steps will detail exactly how to do that, and at the end of this next section, you will have set up a complete Continuous Integration / Continuous Delivery (CI/CD) pipeline for your website. By the way, this is a big deal.
So let’s get to it!

Setting up CI/CD
The next step in the process is to setup a way to automatically push updates out to our live website in a seamless manner.
We can do that using Github Actions. Github Actions are automation tools that can kick off a workflow to perform a number of automated tasks. For instance, want to kick off a suite of tests when new code is uploaded, or build and deploy a website? This is exactly what Github Actions can do.
This is what we want the workflow to do:

We already have the Repo covered with Github, so now we need to setup a Workflow that will then launch a Docker container that will deploy our website. I’ll go into what Docker is here in a minute, but first, let’s set the stage for our Workflow to be able to launch.
Setting up a WorkFlow
To set up a workflow, that we can point GitHub Actions to, we need to go back into where we were making modifications to our website code and create a few more files.
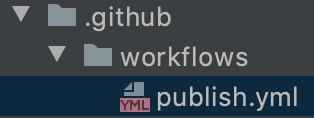
First, let’s create a hidden folder named .github, and inside of that folder, a separate folder called workflows.
Inside of the Workflows folder, we need to create a file. I called mine publish.yml, since the purpose of this workflow will be to publish our website.
After you’ve created all of these, your directory should look like this.
Now that you have a publish.yml file, here is the code you will be putting into that file. I will go through each of these line by line so you know what they are doing.
name: Publish Hugo to FireBase

on:
  push:
    branches:
      - master

jobs:
  firebase_publish:
    runs-on: ubuntu-latest
    steps:
      - name: Checkout
        uses: actions/checkout@v1
        with:
          submodules: true
      - name: Upload to FireBase Hosting
        uses: ./.github/actions/firebase-upload
        with:
          firebase-token: ${{ secrets.FIREBASE_TOKEN }}
          firebase-project: ${{ secrets.FIREBASE_PROJECT }}
- The name at the top is the name we are choosing to call this workflow. This will show up in Github when the workflow is kicked off.
on:
  push:
    branches:
      - master
- The next few lines describe when we want the workflow to launch. This workflow will kick off when code is pushed to the master branch.
jobs:
  firebase_publish:
    runs-on: ubuntu-latest
- Next we are stating what jobs will kick off when code is pushed to the master branch.
firebase_publishis the name we are giving to the job, andruns-onis the environment we are going to be running in. For those unfamiliar,Ubuntuis a type of Linux environment commonly used.
steps:
      - name: Checkout
        uses: actions/checkout@v1
        with:
          submodules: true
- This is the first step we will be taking. The name of the first step is
Checkout, and in this, we will actually be launching a common action that is provided on the GitHub Marketplace. There are a host of Actions available from first-party and third-party vendors, so before you go creating new actions, look to see if one may already be available to accomplish what you need like we are doing here.
All this action does is check out the latest version of our code to be used in the following step.
- name: Upload to FireBase Hosting
       uses: ./.github/actions/firebase-upload
       with:
         firebase-token: ${{ secrets.FIREBASE_TOKEN }}
         firebase-project: ${{ secrets.FIREBASE_PROJECT }}
- Here we are declaring the step to actually upload the code to our Firebase project, and with it, we are passing in the location of the action as well as some parameters,
secrets.FIREBASE_TOKENandsecrets.FIREBASE_PROJECT.
Since the action that we are going to create requires these secrets, let’s discuss those next.
Using Github Secrets
GitHub Secrets are a really nifty feature which allow developers to hide certains keys/secrets from being disclosed in there codebase. Only the developer will have access to these secrets, and they can swap them out at anypoint.
The reason you want to use secrets and not store your FIREBASE_TOKEN directly in this file are for security reasons. This FIREBASE_TOKEN is your unique “password” that allows you to deploy code to your website. If someone else were to obtain this token, they could essentially “take over” your website, and push whatever content they wanted. That would be bad, right? And since GitHub has options for people to make there code publicly available, you need a way to store sensitive information like tokens while still being able to use things like Github Actions to take advantage of automated workflows.
So the next step is to obtain your token and project name from Firebase so that we can add those into Github Secrets, which will allow us to pass those items into our script that will deploy our website.
Obtaining Firebase Project ID / Token
From your terminal or command line window within your websites top-level directory (where your .git/.github/ folders are), run the following command.
firebase projects:list
That will output something like this:
 Preparing the list of your Firebase projects
┌──────────────────────┬──────────────────────┬────────────────┬──────────────────────┐
│ Project Display Name │ Project ID           │ Project Number │ Resource Location ID │
├──────────────────────┼──────────────────────┼────────────────┼──────────────────────┤
│ <your project name>  │ <your project ID>    │ ############   │ [Not specified]      │
├──────────────────────┼──────────────────────┼────────────────┼──────────────────────┤
Here you will want to record/copy your PROJECT_ID, as this will be one of the items to add into our Github Secrets.
Next, to obtain your token, we will need to login to firebase cli which will print a token that we can use for deploying from Github Actions.
Run the following command, which will launch a browser for you to login.
firebase login:ci
Once you go through the authentication in your browser, you shoul be redirected back to your terminal screen which will have printed out something like the following:
Waiting for authentication...

✔  Success! Use this token to login on a CI server:

<authentication token>

Example: firebase deploy --token "$FIREBASE_TOKEN"
Now that you have authenticated and obtained the secrets that we want to store, let’s put those into Github Secrets.
Adding items into Github Secrets
Back in your Github Repository for this project, click on settings for your project.

Once on settings, find Secrets from the left-hand menu and then select New Secret.

Now, add in two new secrets, FIREBASE_TOKEN and FIREBASE_PROJECT and there respective values.
Now that the secrets are added, we can continue on hooking up the rest of our workflow.
Creating our Custom Action
If you recall from our publish.yml file, our second step was listed as below:
- name: Upload to FireBase Hosting
        uses: ./.github/actions/firebase-upload
This is actually pointing to a script which hasn’t been created yet for our custom action to upload to Firebase Hosting. This script required the above two secrets, which is why we went ahead and set those up.
Now let’s walk through creating our custom action.
We will need to create a couple more folders for this.
Inside of the .github folder, create a folder called actions. Inside of that, create a folder called firebase-upload.
Inside of firebase-upload, create a file called action.yml. This is where our custom action will be.
Your directory structure should look like this now.

Inside of action.yml, place the following code. (Again, I will walk through these).
name: 'Build Hugo Site and Deploy to FireBase'
description: 'Builds the site using Hugo, and deploy it to Firebase Hosting'

branding:
  icon: 'arrow-up-circle'
  color: 'green'

inputs:
  firebase-token:
    description: 'Firebase token (obtained via firebase tools -- firebase login:ci)'
    required: true

runs:
  using: 'docker'
  image: 'docker/Dockerfile'
  args:
    - ${{ inputs.firebase-token }}
    - ${{ inputs.firebase-project }}
Alright, so looking at this line by line, we have the following:
name: 'Build Hugo Site and Deploy to FireBase'
description: 'Builds the site using Hugo, and deploy it to Firebase Hosting'
- Similar to our
publish.yml, this part just states the name of the step/action that will be running and a description of its task.
branding:
  icon: 'arrow-up-circle'
  color: 'green'
- The name of the icon associated with this action when it’s running. You can see a list of these here and choose a different one if you’d like.
inputs:
  firebase-token:
    description: 'Firebase token (obtained via firebase tools -- firebase login:ci)'
    required: true
- List of the inputs required for this Action to be able to function.
runs:
  using: 'docker'
  image: 'docker/Dockerfile'
  args:
    - ${{ inputs.firebase-token }}
    - ${{ inputs.firebase-project }}
- This is the area where we state what actions this action will be taking (not confusing, right?)
Essentially we are stating we are using docker, and the file for that is located at docker/Dockerfile, (or soon will be), and takes the inputs that we just passed in to this action (token/project).
Now that our Action is set up, let’s get the Docker Container going! But first, a little about Docker.
What is Docker?

Docker Containers are super simple Virtual Environments for hosting an application or launching some tasks. Gone are the days of having multiple servers in a room, each with different operating systems to handle various tasks.
Also, gone are the days where you needed an entire Virtual Machine to spin up just to launch a specific task. Docker takes these two items that could take hours and perform a task down to seconds or minutes. It essentially lets you build a super small virtual environment catered towards your specific task.
The reason Docker is so nice is because it’s reliable. You know that every time your Docker Container spins up, it’s going to work because it is essentially in a fixed state, and you don’t need to worry about any unknown variables in your environment that could fail your application or scripts.
I don’t want to get too into the weeds, but just know that Docker is an extremely powerful tool, and will help us in our setup to create an environment that will allow us to build our site using Hugo and deploy using Firebase. Pretty cool, right? If you want to read more about Docker, here you go.
Creating our Dockerfile
Dockers are launched from Dockerfiles, as you can see from the last line we described inside of our action.yml file.
So let’s go ahead and create another directory and file that reflects where our action is looking. Create a new directory called docker and a file within that called Dockerfile.
So our directory should now look like the following:

Inside of our Dockerfile, we will add the following:
FROM node:alpine
MAINTAINER <your email address>

ENV HUGO_VERSION 0.74.3
ENV HUGO_BINARY hugo_${HUGO_VERSION}_Linux-64bit

# install hugo
RUN set -x && \
  apk add --no-cache wget ca-certificates && \
  update-ca-certificates && \
  cd /tmp &&\
  wget https://github.com/gohugoio/hugo/releases/download/v${HUGO_VERSION}/${HUGO_BINARY}.tar.gz -O hugo.tar.gz && \
  tar xzf hugo.tar.gz && \
  mv hugo /usr/bin/hugo && \
  rm -r * && \
  apk del wget

RUN npm install -g firebase-tools

ADD entrypoint.sh /entrypoint.sh
ENTRYPOINT ["sh", "/entrypoint.sh"]
And let’s break that down:
FROM node:alpine
MAINTAINER <your email address>
- The first
FROMis pointing to a operating system that our container will be based on.Alpineis a super-duper slimmed down version of a Linux box, only weighing in at about 5mb’s. This goes to show the powerful aspect of Docker. Instead of us having to create an entire separate virtual environment ourselves, Docker comes pre-packaged with some ready to go that are updated to be the latest and greatest. The maintainer field is just stating that I’m the one maintaining this particular image. This is useful in case I ever wanted to blast this out to the universe for others to use.
ENV HUGO_VERSION 0.74.3
ENV HUGO_BINARY hugo_${HUGO_VERSION}_Linux-64bit
- These are a couple variables to declare the latest versions of HUGO. This is really the only thing that you may want to update periodically to take advantage of the latest versions.
# install hugo
RUN set -x && \
  apk add --no-cache wget ca-certificates && \
  update-ca-certificates && \
  cd /tmp &&\
  wget https://github.com/gohugoio/hugo/releases/download/v${HUGO_VERSION}/${HUGO_BINARY}.tar.gz -O hugo.tar.gz && \
  tar xzf hugo.tar.gz && \
  mv hugo /usr/bin/hugo && \
  rm -r * && \
  apk del wget

# install firebase
RUN npm install -g firebase-tools
- These are commands that we want to have run as soon as this container is built. It is essentially just downloading the latest versions of Hugo and Firebase and setting that up inside of this container for us to use.
ADD entrypoint.sh /entrypoint.sh
ENTRYPOINT ["sh", "/entrypoint.sh"]
- Next we point to an additional script that we want to have run once everything else has been completed, and we point to the
ENTRYPOINT, which basically tells the container now that we are setup appropriately, launch this script!
And there you have it! We have setup and built our Docker Container! Now to add the final script that will compile and deploy our website!
Setting up our Deployment Script
Now, inside of the same docker directory, add a script called entrypoint.sh. The .sh indicates that this is a shell-script, written in bash. Basically the same syntax you can use on the command-line inside of a terminal. So what this means is that we are now sending in a list of commands to the terminal inside this Docker Container of things to run.
Inside of entrypoint.sh, add the following lines of code.
#!/bin/sh -x

# Show env info
node -v
hugo version
firebase --version

# Use input parameters
FIREBASE_TOKEN=$1
FIREBASE_PROJECT=$2

# Build site
hugo

# Publish to Firebase
firebase use --add "$FIREBASE_PROJECT" production
firebase deploy -m "Commit SHA: $GITHUB_SHA" --token "$FIREBASE_TOKEN" --only hosting --project "$FIREBASE_PROJECT"
And let’s break down this final bit of code :)
# Show env info
node -v
hugo version
firebase --version
- Quick printout of our current environmental setup. This is always good so that you don’t have to dig into the code to figure out versions.
# Use input parameters
FIREBASE_TOKEN=$1
FIREBASE_PROJECT=$2
- Setting up a couple variables based on the inputs that were provided when this script was launched.
Recall that, when we called the
Dockerfileearlier from ouraction.yml, that it passed in these two variables. Docker then passes those into theENTRYPOINTfile.
# Build site
hugo
- Well… HUGO sure does make that easy! This compiles all the files for your site together so they are staged for release.
# Publish to Firebase
firebase use --add "$FIREBASE_PROJECT" production
firebase deploy -m "Commit SHA: $GITHUB_SHA" --token "$FIREBASE_TOKEN" --only hosting --project "$FIREBASE_PROJECT"
- This is essentially the commands to deploy our HUGO site to Firebase. The
GITHUB_SHAvariable is what’s known as a global variable inside of GITHUB_ACTIONS, so we don’t need to worry about providing that.
Hooking up our new Workflow on Github and Testing
Phew! We have finally added in all of the components to make our CI/CD pipeline a reality, and automatically deploy our website.
Now, before we celebrate TOO much, let’s ensure it’s all working appropriately. Go ahead and push all of this new code up to your Github repository using the commands provided earlier on in the blog.
Now, because Github knows to look into the .github/workflows folders, it will see that we’ve setup a new workflow, and will automatically kick it off.
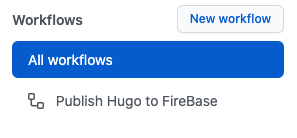
To see this action in progress, on your Github page, click on actions:

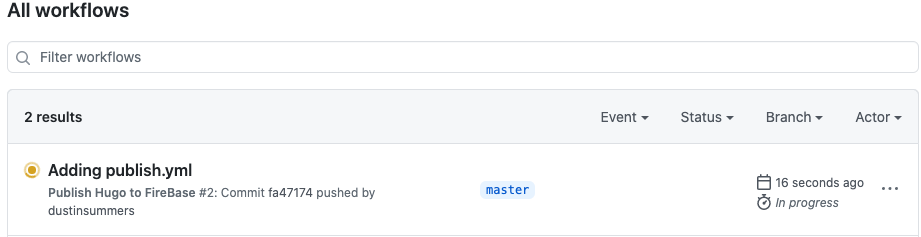
On this page, you will see a list of your workflows, as well as the currently running workflow.
Hopefully, upon completion, you see the following output:
If not, see what the error is by clicking on the workflow and reading the logs.
But if it did work… CONGRATULATIONS. You have successfully built a complete CI/CD pipeline for your website, and it should all be ready to see.
Now, everytime that you add changes to your website and push those into Github, they will automatically be deployed to your live website!
Reaching the summit.

If you have been following along up until this point, that is huge. Seriously, you literally just built a website and setup an entire end-to-end delivery system for it, implementing and leveraging some of the most powerful and popular tools to date.
This is a big deal, and deserves a moment of reflection on how far you have come.
I for one am extremely proud of you. I would love to see your final creation, so please, post that in the comments below or message/email me directly!
I hope this blog was an aid in helping you to learn how to build and host a website using HUGO and the other tools discussed throughout.
I look forward to seeing your creations.